Free Crochet Pattern
Crochet Sunflower Planter Pattern
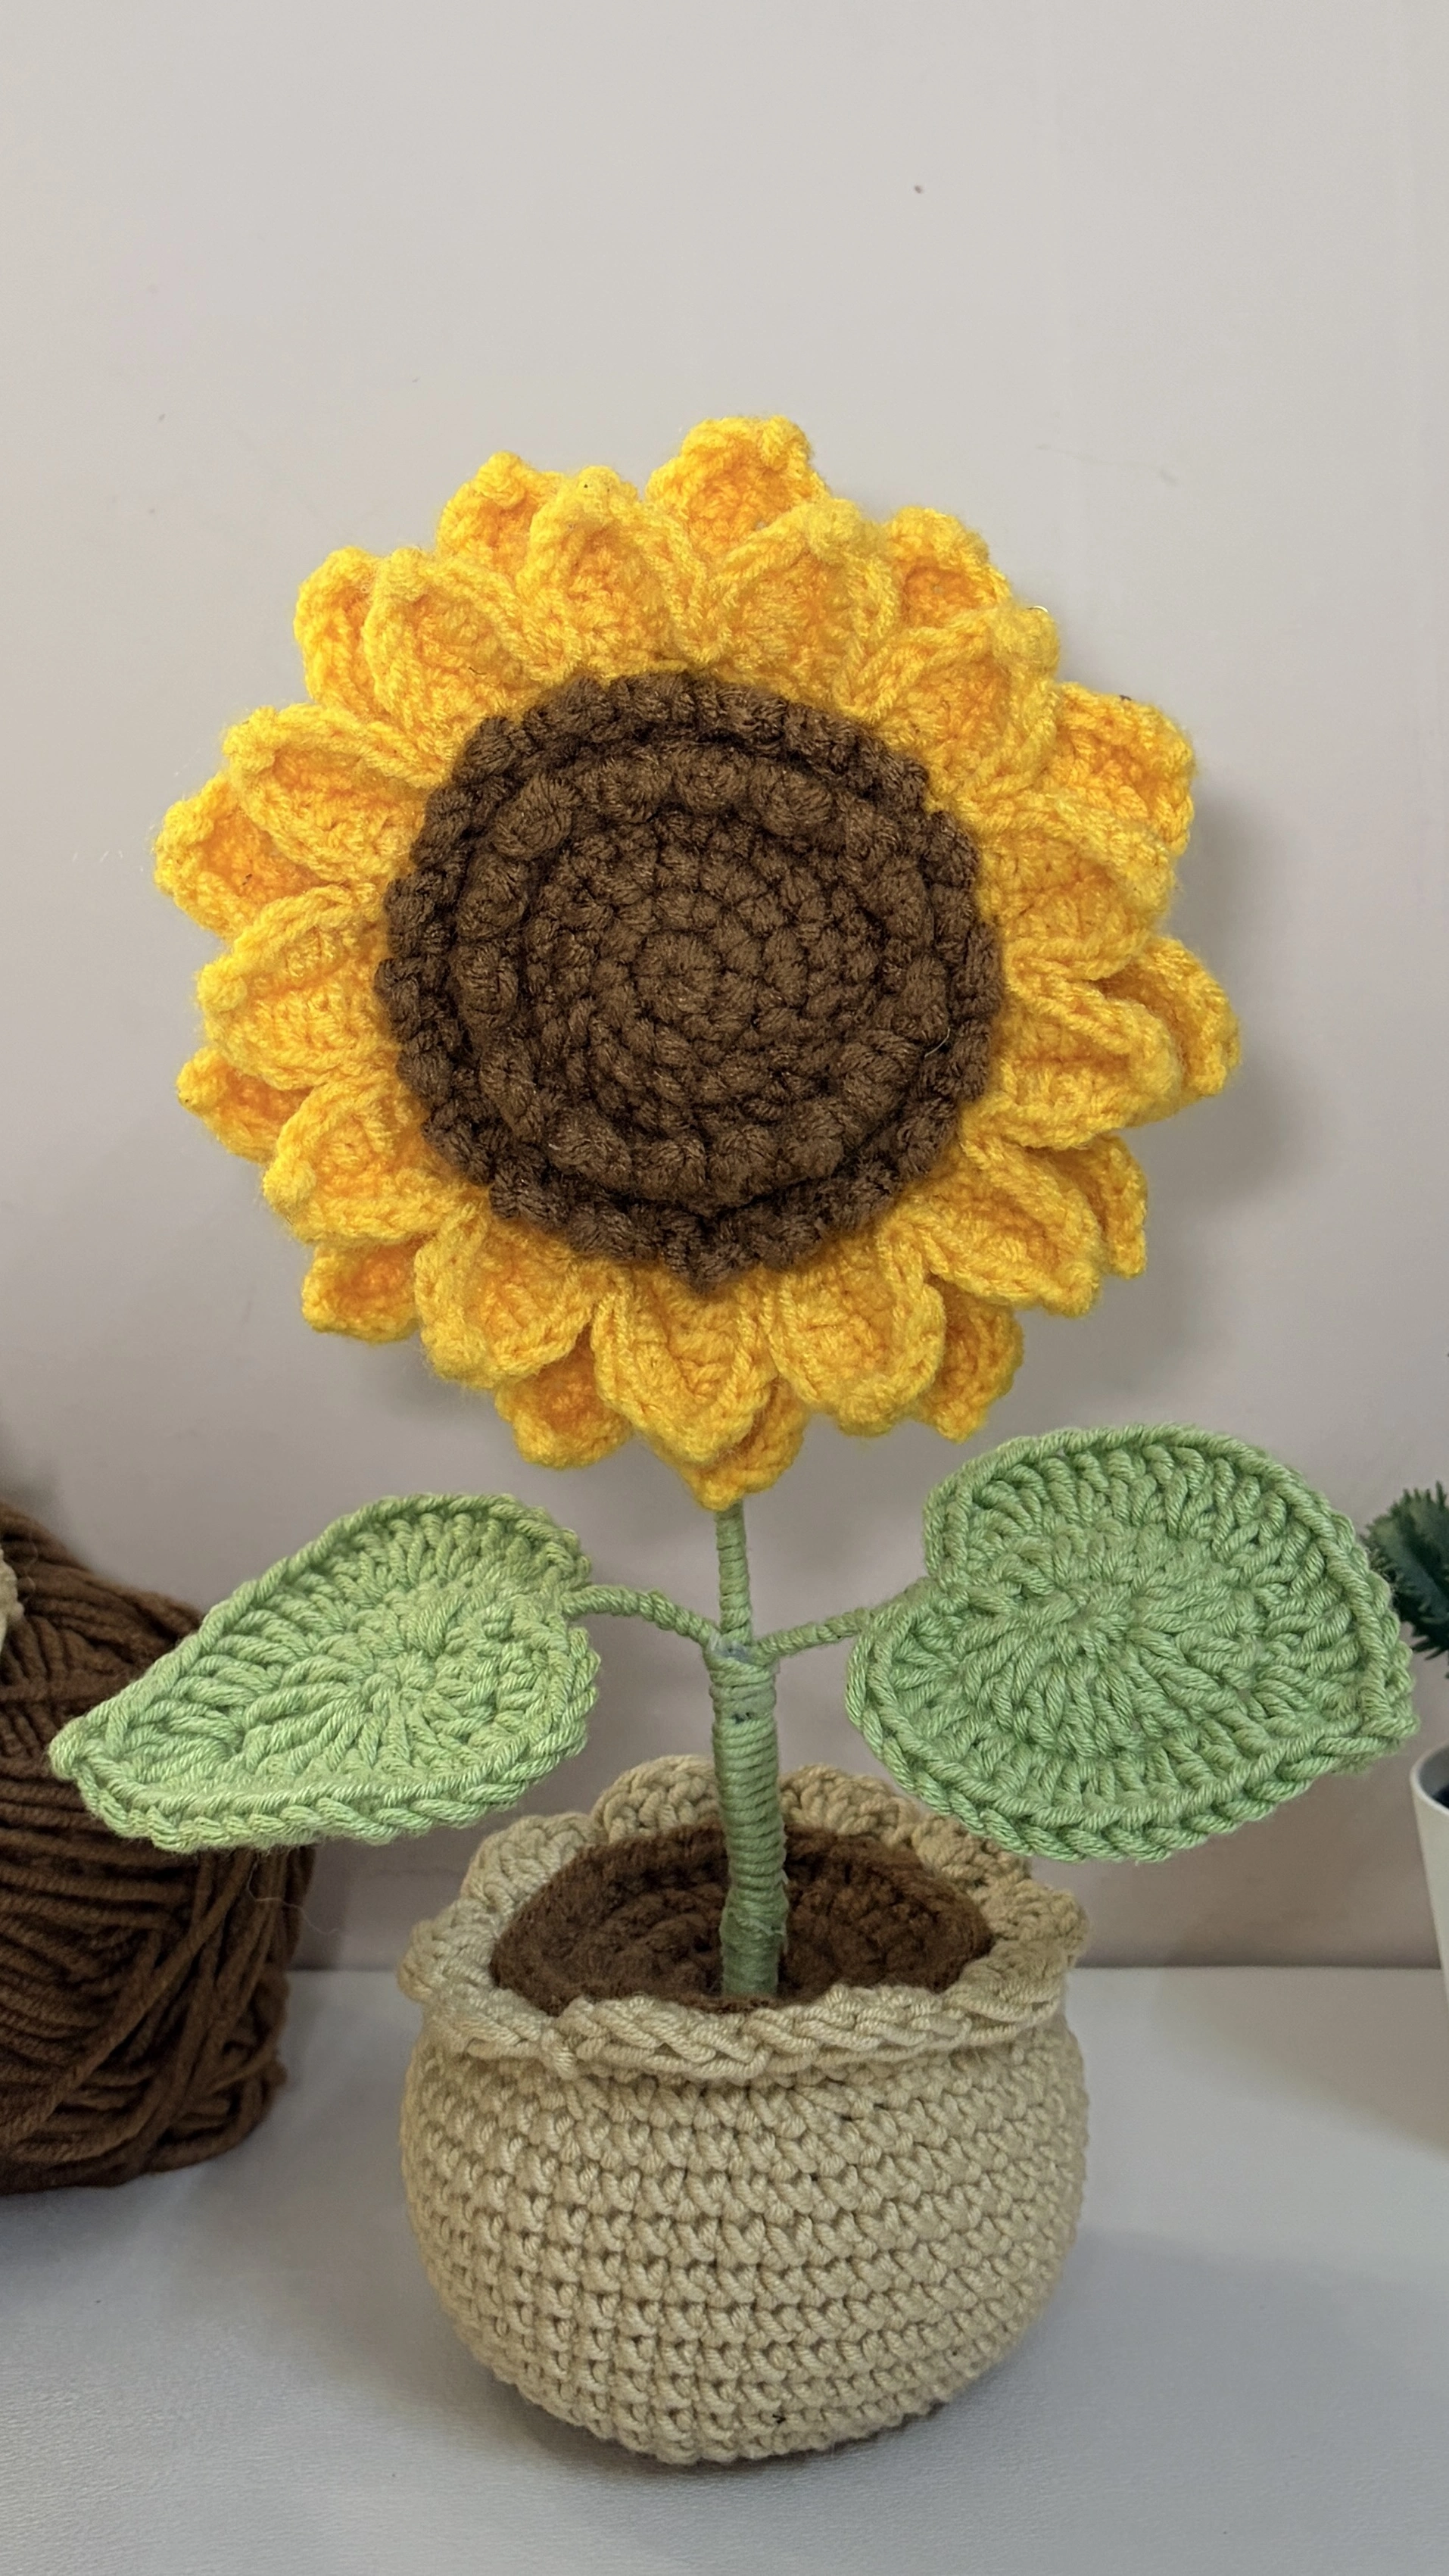
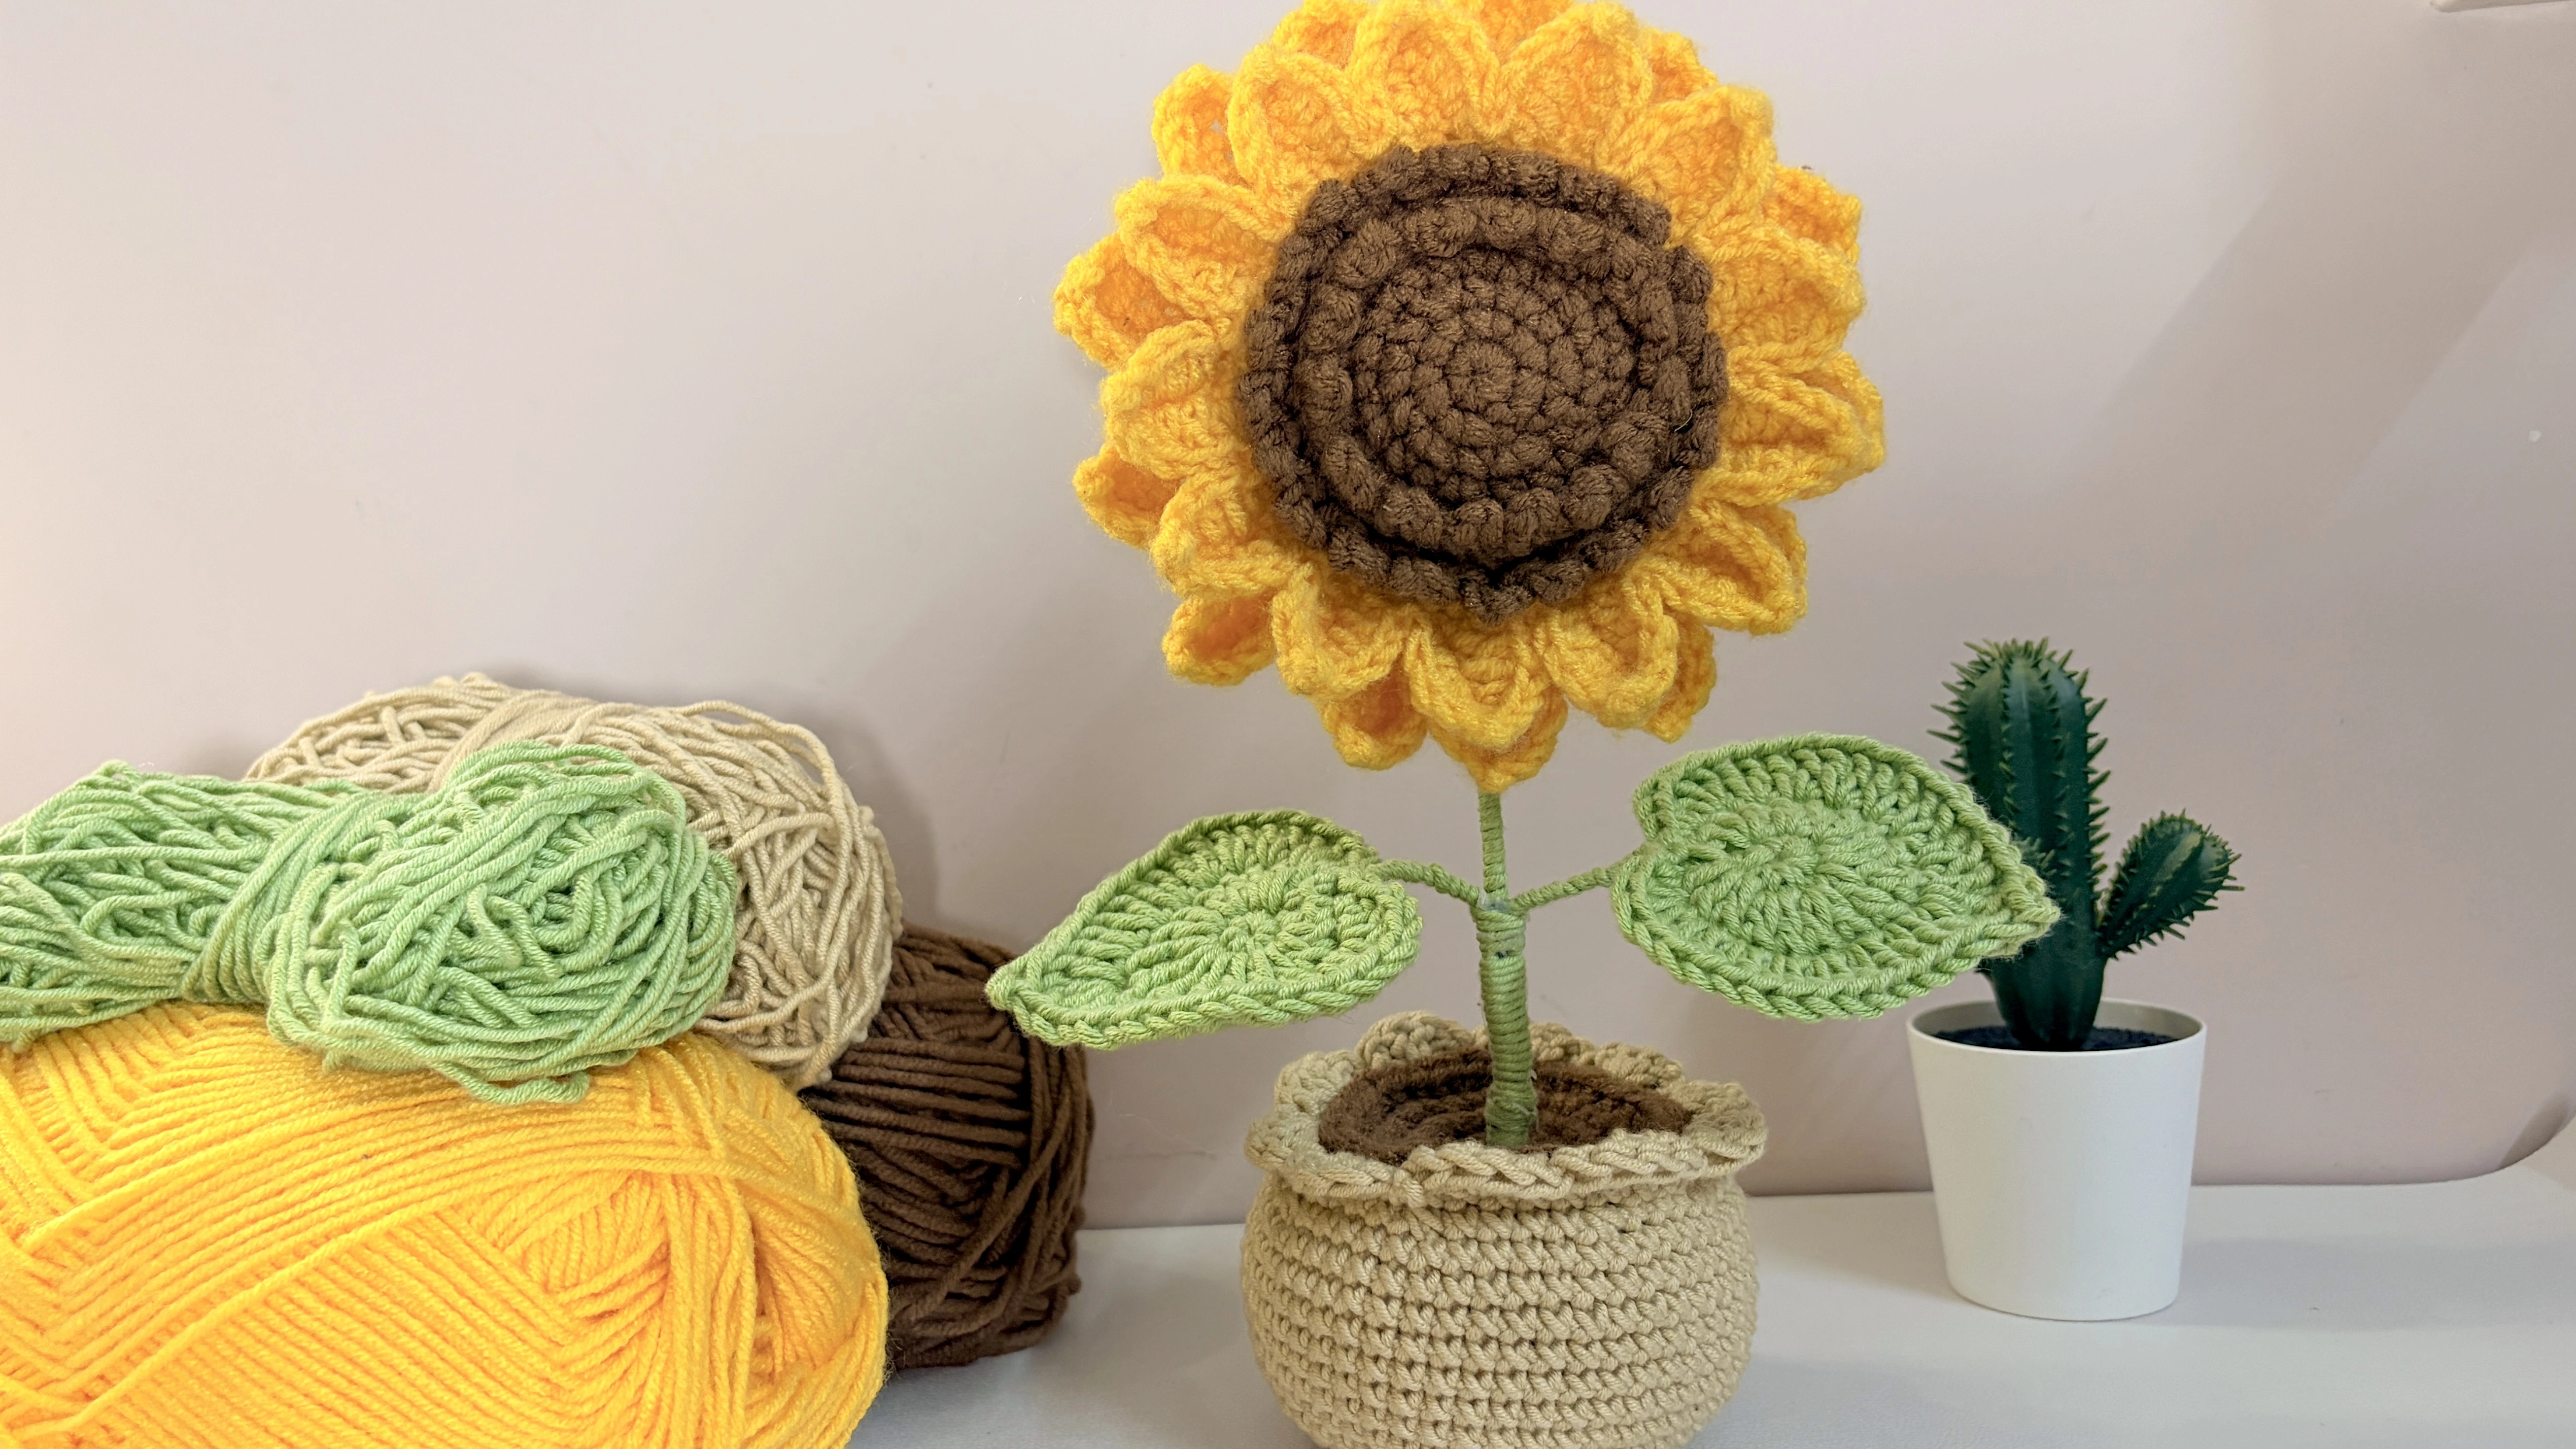
This little crochet sunflower is such a cute addition to your desk, shelf, or garden decor! The bright yellow petals and tiny green leaves make it a lovely piece to display around your home. You can also make one as a handmade gift for someone who loves flowers or crochet. Follow the written pattern below to make your own sunflower planter!
About the Pattern
This crochet sunflower planter is a beginner-friendly project, and I’ve explained everything step by step so you can follow along at your own pace. The project has several parts to make, including the crochet pot, soil, sunflower center, tiny seeds, two layers of yellow petals, and green leaves. You’ll also learn how to shape the petals and leaves using thin wire and assemble all the pieces to create your finished sunflower.
Since there are quite a few pieces to crochet and assemble, it can take around a day to complete, depending on your speed and experience. Take your time with each part, and don’t worry if it takes a little longer. Watching all the pieces come together is the best part! The finished sunflower planter looks lovely on a desk, bookshelf, or bedside table. It also makes a beautiful addition to your home decor or a thoughtful handmade gift for someone special.
Video Tutorial
Follow along with the video tutorial as you make your crochet sunflower planter. The written instructions below include every part of the pattern, and the video can offer an extra visual guide as you crochet and assemble the flower.
Materials and Tools
- Four yarn colors: brown, yellow, green, and beige
- A combination of weight 3 and weight 4 yarn
- 4 mm crochet hook, or an appropriate hook for the yarn
- Thin wire for the petals and leaves
- Wooden stick, floral stick, or skewer for the stem
- Hot glue gun or suitable alternative
- Polyfill stuffing or leftover yarn scraps
- Scissors, stitch markers, and yarn needle
Want to shop the materials?
Check out the materials here →Crochet Abbreviations
Written Pattern
How to Crochet the Sunflower Planter
Part 1: Planter Pot
Start with a magic ring.
Round 1: Ch 1, work 8 sc into the magic ring. Pull the tail to close. (8 sts)
Round 2: Inc in each stitch around. (16 sts)
Round 3: Repeat (1 sc, inc) around. (24 sts)
Round 4: Repeat (2 sc, inc) 8 times. (32 sts)
Round 5: Repeat (3 sc, inc) around. Sl st to join and ch 1. (40 sts)
Round 6: Working in BLO, sc in each stitch around to create the ridge between the base and sides. (40 sts)
Round 7: Repeat (4 sc, inc) around. (48 sts)
Rounds 8–15: Sc in each stitch around without increasing or decreasing. (48 sts per round)
Round 16: Repeat (4 sc, dec) around. (40 sts)
Round 17: Sc in each stitch around and sl st to finish. (40 sts)
Decorative edging
Repeat around the rim: skip 1 stitch, work 4 dc into the next stitch, skip 1 stitch, and sl st into the following stitch.
Part 2: Soil Piece
Make one piece using Rounds 1–5 of the planter pot pattern. The piece should end with 40 stitches.
Part 3: Sunflower Center and Seeds
Center — Brown Yarn
Start with a magic ring.
Round 1: Work 6 sc into the magic ring. Pull tight and sl st to join. (6 sts)
Round 2: Ch 1, inc in each stitch around. Sl st to join. (12 sts)
Round 3: Ch 1, repeat (1 sc, inc) 6 times. (18 sts)
Round 4: Ch 1, repeat (2 sc, inc) 6 times. (24 sts)
Round 5: Ch 1, repeat (1 sc, inc, 1 sc) 8 times. Sl st to join. (32 sts)
Round 6: Working in BLO, ch 1, repeat (3 sc, inc) around. Sl st to join. (40 sts)
Round 7: Working in BLO, ch 1, sc in each stitch around. Sl st to join, ch 1, and fasten off. (40 sts)
Seeds — Brown Yarn
Attach brown yarn to an FLO of Round 6. Repeat this sequence around the exposed front loops of Rounds 6 and 7:
Ch 3, sl st into the same stitch, skip the next stitch, and sl st into the following stitch.
Part 4: First Layer of Sunflower Petals
Use yellow yarn to create 13 base petals. Attach yellow yarn to an FLO of the last round of the flower center.
Petal 1
Ch 6. Skip the first chain and work 1 sc into each of the next 5 chains. Skip the next FLO on the center and sl st into the following FLO.
Petals 2–13
Sl st into the next stitch. Repeat (ch 6, skip the first chain, work 5 sc into the next 5 chains, skip 1 stitch on the center, and sl st into the next stitch) until 13 petals have been made.
Shape the petals with wire
Incorporate thin wire along the petal edges, keeping the wire close to the edge and securing the ends safely.
Work up one side
- 1 hdc in the first stitch.
- 1 dc in each of the next 2 stitches.
- 1 hdc in the next stitch.
- 1 sc in the next stitch.
Form the pointed tip
Ch 1 and sl st into the small triangle formed by the loops of the last sc.
Work down the other side in reverse
- 1 sc.
- 1 hdc.
- 1 dc in each of the next 2 stitches.
- 1 hdc.
Sl st into the space between petals. Repeat for all petals.
Part 5: Green Back Piece and Sepals
Green back piece
Using green yarn, repeat Rounds 1–7 of the sunflower center pattern, working through both loops of every stitch rather than BLO. Sl st to join and ch 1.
Sepals
Repeat around the green piece:
- Skip 1 stitch.
- In the next stitch, work 1 sc and 1 dc.
- Ch 1 and sl st into the small triangle to form a point.
- In the same stitch, work 1 dc and 1 sc.
- Skip 1 stitch and sl st into the next stitch.
Repeat around.
Part 6: Joining the Green Back Piece and Second Petal Layer
Join the green back piece
Position the green back piece behind the sunflower, with the center facing you. Join the green piece to the brown center by working through the remaining back loops of the brown center together with the corresponding stitches of the green piece.
Make the second petal layer
Position the second petal layer behind the first layer so the petals alternate. Use yellow yarn to make the longer petals. Repeat around:
- Ch 8.
- Skip the first chain and work 1 sc in each of the next 7 chains.
- Skip 1 stitch across the joined flower and green piece.
- Sl st into the next stitch.
- Sl st into the following stitch.
Shape the second petal layer with wire
Work up one side
- 1 sc in the first stitch.
- 1 hdc in each of the next 2 stitches.
- 1 dc in each of the next 2 stitches.
- 1 hdc in the next stitch.
- 1 sc in the next stitch.
Form the pointed tip
Ch 1 and sl st into the small triangle.
Work down the other side
- 1 sc.
- 1 hdc.
- 1 dc in each of the next 2 stitches.
- 1 hdc in each of the next 2 stitches.
- 1 sc in the next stitch.
Sl st into the space between petals. Repeat for all petals. Finish with a sl st, ch 1, and cut the yarn.
Part 7: Leaves — Make 2
Use green yarn and start with a magic ring.
Round 1
Work 7 sc into the magic ring. Pull the tail to close and sl st to join. (7 sts)
Round 2
- Ch 2.
- Work 3 dc into the same stitch.
- Work 2 dc in each of the next 2 stitches.
- Work 3 tr in the next stitch.
- Work 2 dc in each of the next 2 stitches.
- Work 3 dc in the next stitch.
- Sl st into the starting space of the first group of 3 dc.
Round 3 — With Wire Along the Edge
Incorporate thin wire along the leaf edge as you work.
- First stitch: 1 sc + 1 hdc.
- Next stitch: 3 dc.
- Next 6 stitches: 1 dc increase in each stitch.
- Next stitch: 1 dc.
- Next stitch: 1 tr, ch 1, sl st into the small triangle to form the leaf tip, then 1 tr and 1 dc in the same stitch.
- Next 6 stitches: 1 dc increase in each stitch.
- Next stitch: 3 dc.
- Next stitch: 1 hdc + 1 sc.
- Next stitch: sl st.
Fold the wire ends together to form a leaf stem. Wrap green yarn around the wire and secure it with hot glue. Make a second leaf using the same instructions.
Part 8: Assembly
-
Attach the soil
Thread beige yarn onto a yarn needle. Position the soil piece on top of the planter pot and sew through corresponding back stitches. When halfway around, add polyfill stuffing or yarn scraps evenly to create a slightly raised soil surface. Finish sewing around the piece. Knot the yarn, trim it, and tuck in the tail.
-
Attach the leaves to the stem
Wrap green yarn around the wooden stick, securing it with glue as you go. Attach the leaves approximately halfway up the stem using glue. Continue wrapping green yarn over the attachment points and toward the end of the stick. Secure the yarn and gently shape the leaves by hand.
-
Attach the sunflower
Gently widen the center opening in the soil piece created by the magic ring. Test the stem’s position. Apply hot glue to the bottom of the stick and insert it into the soil. Apply a small amount of hot glue to the top of the stem and insert it into the sunflower. Allow the glue to set securely.
A Little Note from Stitchy Days ♡
Hi there!
Thank you so much for trying one of my crochet patterns! I’m so happy to have you here, and I hope you enjoy making this project as much as I enjoyed creating it.
If you make something using this pattern, I’d love to see it! Feel free to tag Stitchy Days when you share your finished project. Seeing your creations means so much to me as I continue growing this little crochet corner.
Thank you for supporting my work and happy crocheting! ♡