Free Crochet Pattern
Easy Crochet Bandana Pattern for Beginners | Free Written Pattern + Video Tutorial
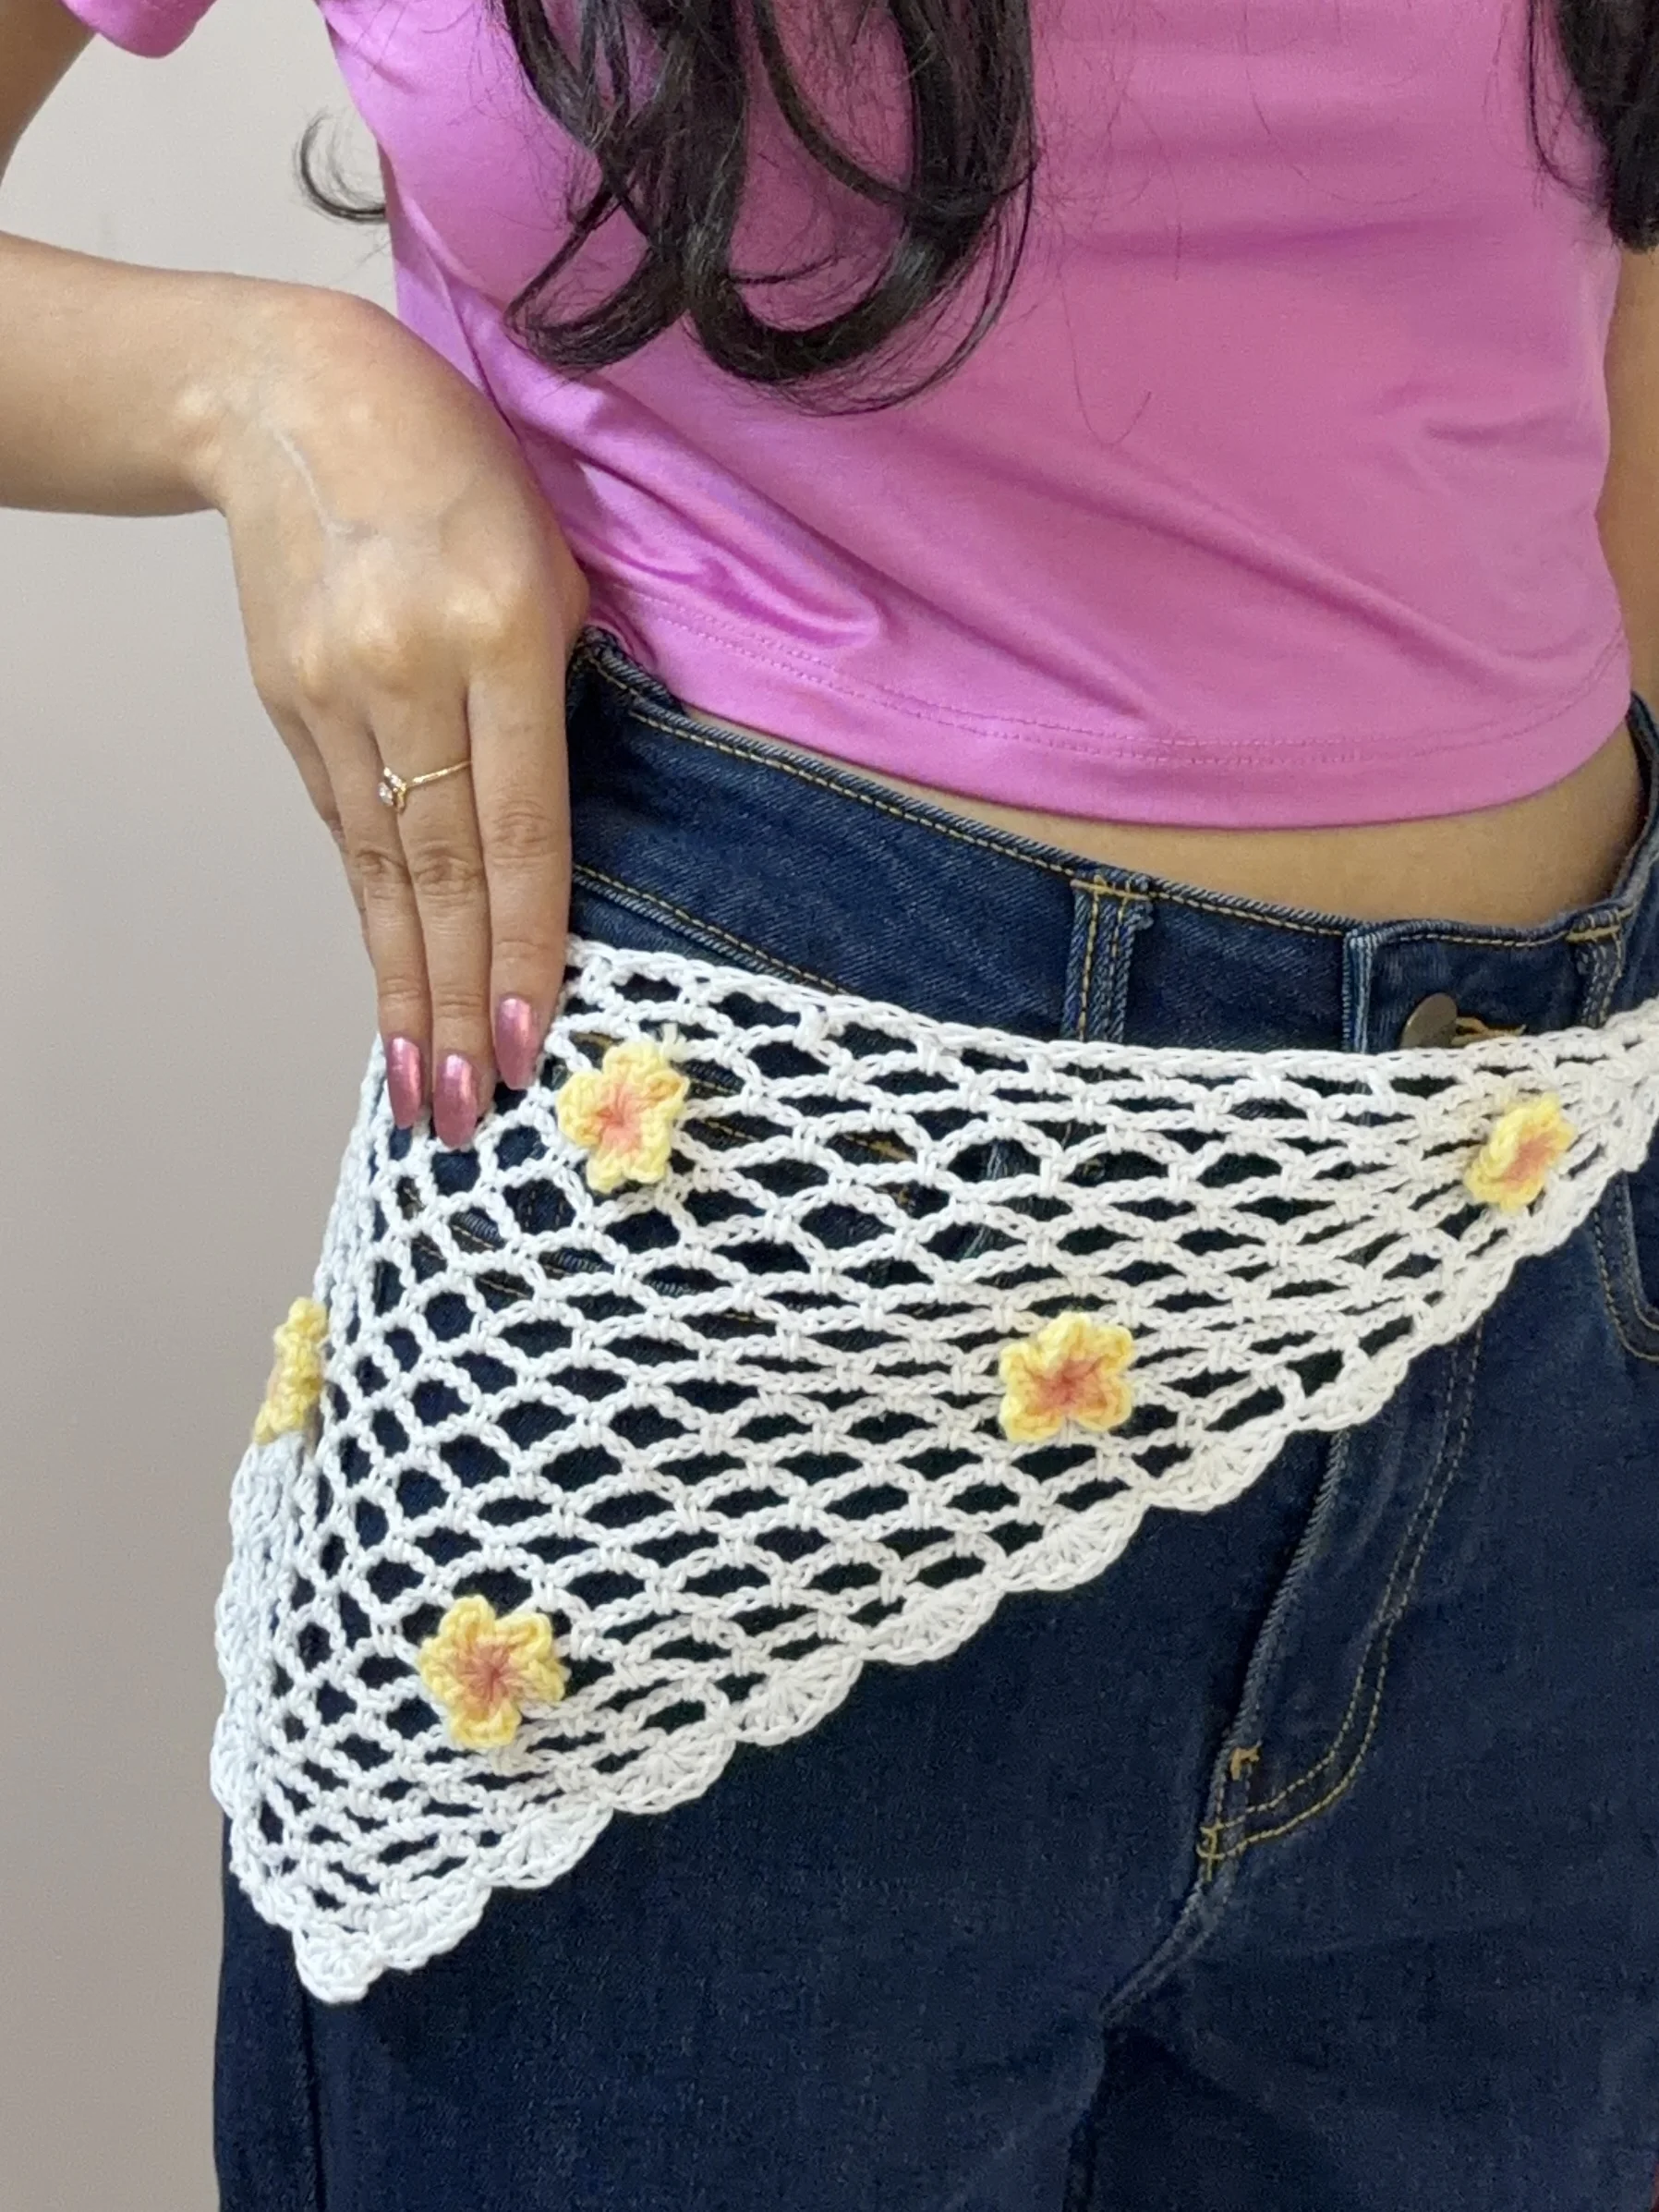
This easy crochet bandana is a quick summer project made with a simple mesh pattern. It’s lightweight, easy to customize, and perfect for adding a handmade touch to your summer outfits.
About the Pattern
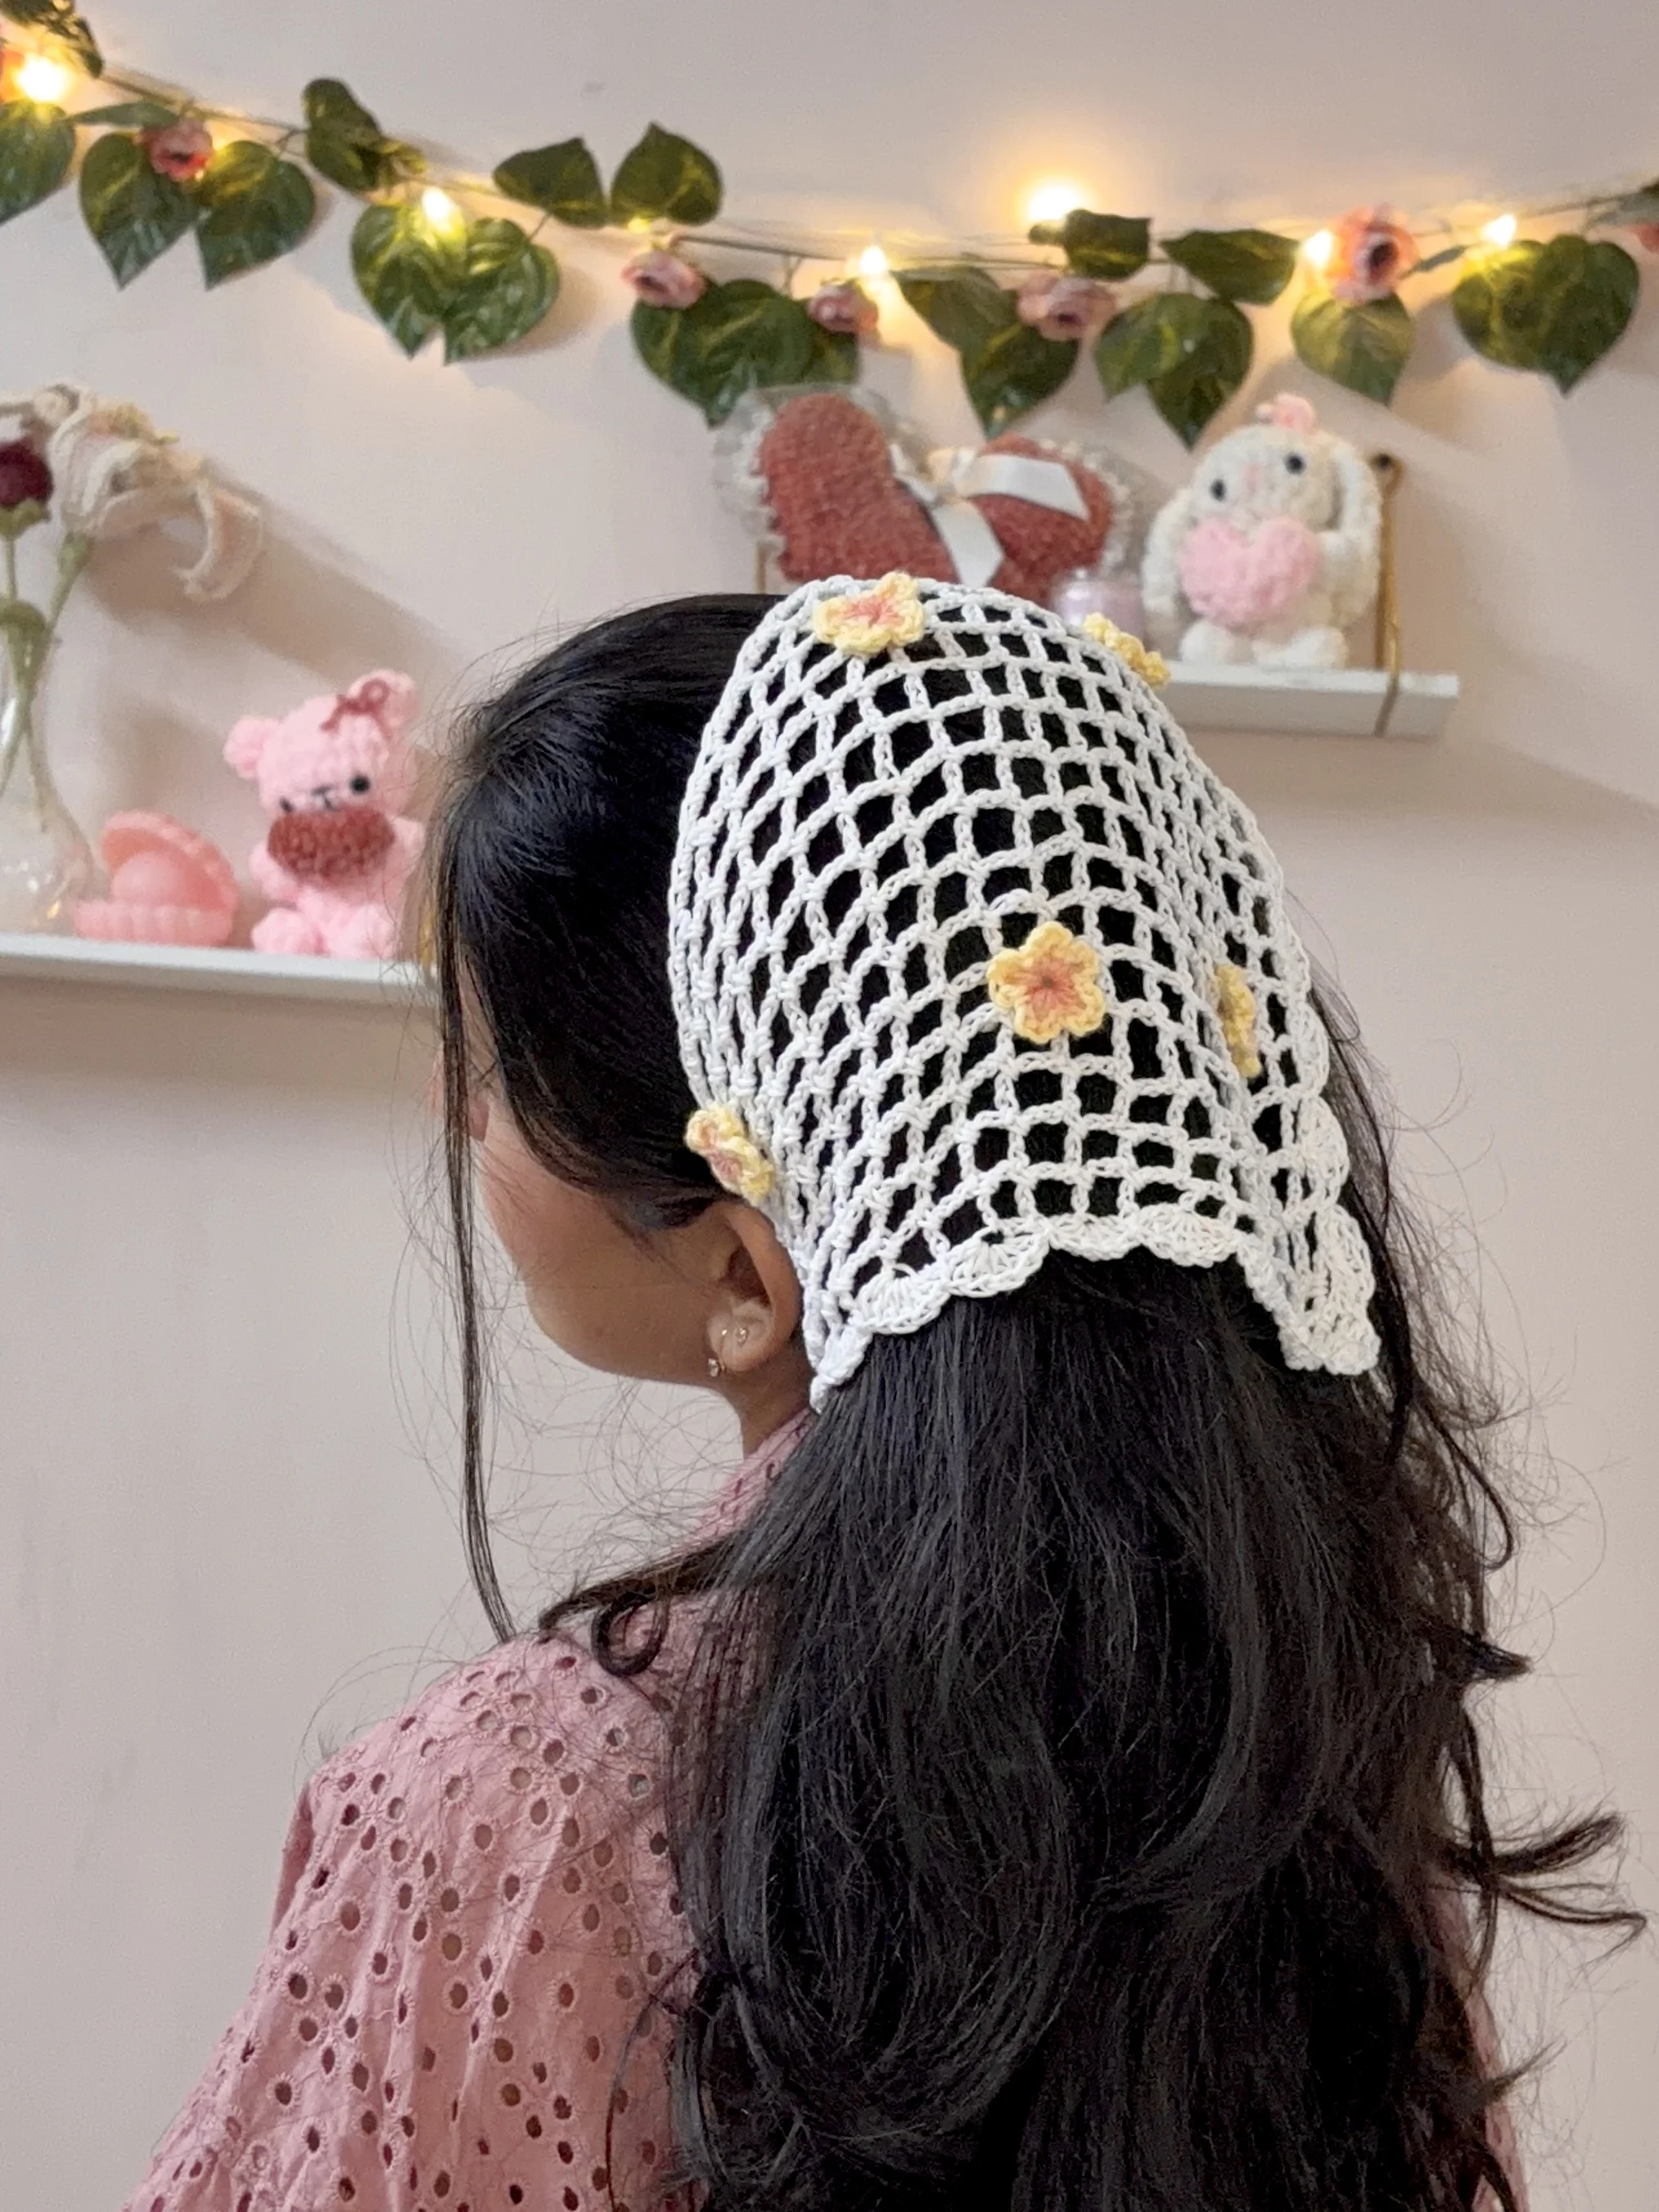
This beginner-friendly accessory uses chains, single crochet, and double crochet stitches. The mesh design creates an open, lightweight fabric that’s comfortable to wear in warm weather. The pattern starts at one corner and gradually increases to create the triangular shape. Once you’ve reached your desired size, you can add a lace border, crochet the ties, and decorate your bandana with tiny flowers.
The bandana works up quickly, making it a lovely project when you want to crochet something cute without spending hours on it. Adjust the number of rows to make it smaller or larger. I added little flowers to mine, but you can keep it simple with just the mesh pattern, add a pretty lace border, or decorate it with tiny crochet flowers.
Video Tutorial
Prefer watching someone crochet along with you? Follow the full video tutorial on my YouTube channel, Stitchy Days. The video is especially helpful for seeing how the mesh loops are formed, how the bandana increases with each row, and how to add the finishing details. If this is your first mesh project, watch the beginning before starting; once you understand the loops, the repeating rows become much easier.
Materials
- Lightweight Weight 2 cotton yarn
- 2.5 mm or 3 mm crochet hook, depending on your yarn and tension
- Stitch markers (optional)
- Scissors
- Yarn needle
- Optional: eyeshadow or blush for shading the flowers
Want to shop the materials?
Check out the materials here →Abbreviations
Written Pattern
How to Crochet the Bandana
1. Foundation
Start with a slip knot and chain 7.
R1: Make 1 dc into the very first chain.
This creates the small starting section for your bandana.
Tip: Keep your starting chain loose enough to work into comfortably. If it’s too tight, the corner may pull inward.
2. Row 2
Start the next row with the turning chain, then form a new mesh loop.
R2: Ch 7 and turn. Make 1 sc into the loop from the previous row, ch 5, then count 3 chains from the previous row’s dc and make 1 dc into that chain.
You’ve now created the next mesh section.
Tip: The chain spaces form the open mesh. Keep your chains and stitches consistent so the fabric looks even.
3. Row 3
Turn and add another mesh loop to increase the triangle.
R3: Ch 7 and turn. Make 1 sc into the first loop, ch 5, make 1 sc into the next loop, ch 5, then count 3 chains from the previous row’s dc and make 1 dc into that chain.
This row has one more mesh loop than the previous row. Keep increasing this way to grow the bandana.
4. Continue the Pattern
Continue working the same increasing pattern, adding one mesh loop with each new row.
R4–R26: Ch 7 and turn. Make 1 sc into each loop, with ch 5 between the loops. At the end of the row, chain and make 1 dc into the designated chain from the previous row, following the turning edge established in Rows 2 and 3.
Repeat until your bandana reaches your desired size. I used 26 rows. Use fewer rows for a smaller bandana or add rows to make it larger.
Tips for the Main Pattern
- Count your mesh loops to check that the bandana increases consistently.
- Place a stitch marker in the first loop if it’s difficult to find at the start of a row.
- Lay your work flat occasionally to check that the triangle is taking shape evenly.
- If the sides look uneven, check that you’re following the same turning instructions at each row’s end.
5. Optional Lace Border
Add a decorative edge along both slanted sides, or skip this step for a clean mesh edge.
For the lace border, work 5 dc into the space between two rows.
In the next space, make 1 sl st.
Repeat these two steps along both slanted sides of the bandana.
Continue until both sides are finished. The double crochet and slip stitch combination creates a decorative lace edge.
Tips for the Lace Border
- Distribute the stitches evenly along both sides.
- If the border ruffles, check that you aren’t adding too many stitches or working too loosely.
- If the edge pulls inward, check your tension and avoid working too tightly.
6. Ties
The ties let you secure the bandana comfortably around your head. At the end of the bandana’s first side, make the first tie.
Chain 40 for the first tie.
You can make the ties longer or shorter depending on how you want your bandana to fit.
Fasten off if you’re finishing this tie separately, or continue as shown in the video tutorial.
Tip: Check the tie length against how you plan to wear the bandana before cutting your yarn.
7. Tiny Crochet Flower
Add these little flowers to the ties or anywhere you’d like a touch of decoration.
Chain 2.
In the 3rd chain from the hook, work:
(2 dc, ch 2, sl st)
Repeat the same stitch combination 2 more times in the same stitch to create a small three-petal flower.
Chain 1 and cut the yarn.
Leave a yarn tail if you plan to sew the flower onto the bandana.
Tip: Gently arrange the petals with your fingers to neaten the flower.
8. Finish the Top Edge and Second Tie
Attach yarn to one end of the bandana’s top edge and work across to the other end.
Work 3 sc into each mesh space across the top edge.
Ch 40 to create the second tie. Make this the same length as the first tie so the bandana sits evenly.
If you like, make another tiny flower and sew it onto this tie.
Tip: Check that the top edge lies flat. If it gathers or feels tight, adjust your stitch tension.
9. Optional Flower Appliqués
Make and add as many larger flowers as you like, or leave them off.
For the larger flower appliqués, make a magic ring.
Chain 2, then work:
2 dc, ch 2, sl st into the magic ring.
Repeat this 5 times to create a 5-petal flower.
Repeat the flower pattern to make as many appliqués as you’d like.
Close the magic ring and chain 1. Cut the yarn, leaving a tail for sewing.
Arrange the flowers before sewing them securely in place with a yarn needle. Group them near one corner or spread them across the bandana. For soft shading, gently brush a small amount of eyeshadow or blush onto the petals, building the colour gradually.
Tips for the Flowers
- Use one yarn colour for a matching set or mix colours for a playful look.
- Secure the yarn tails carefully so the flowers stay attached.
- If adding makeup for shading, test a small amount on the yarn first.
10. Finish
You’re almost done! Weave in any remaining yarn ends and check that both ties are secure, the top edge and lace border lie flat, and the flower decorations are arranged how you like. Gently shape the bandana before trying it on.
And that’s it—your crochet bandana is ready to wear!
Your Crochet Bandana Is Ready!
Wear it with your favourite summer outfit, tie it around your head on a sunny day, or style it with your hair up or down. Keep it simple or add flowers and a lace border to make it your own.
I hope you enjoyed making this project! If you try the pattern, I’d love to see how yours turns out. Feel free to tag Stitchy Days when you share your finished bandana.
A Little Note from Stitchy Days ♡
Hi there!
Thank you so much for trying one of my crochet patterns! I’m so happy to have you here, and I hope you enjoy making this project as much as I enjoyed creating it.
If you make something using this pattern, I’d love to see it! Feel free to tag Stitchy Days when you share your finished project. Seeing your creations means so much to me as I continue growing this little crochet corner.
Thank you for supporting my work and happy crocheting! ♡